Friday, June 22, 2007

Anchor testing of equalized anchors (cordelettes)

More recent information has been published on cordelettes and alternative equalizing systems (and I'll track those down), but here is some work from 2004-2005 by Beverly et al. on the effectiveness of cordelettes at equalizing loads. (Climbing Nerd Level 1)

Meaty tidbits of knowledge:
  • Even with a symmetrical setup, the load is not perfectly distributed among the legs
  • Asymmetrical or off-axis setups aren't always worse than a symmetrical setup
  • Under load, the system can stretch as much as 10 cm (4 inches)
  • The authors didn't discuss it, but it looks like the middle or the shortest leg often had the greatest force
  • The force required to break one of the legs was >15.2 kN (pretty high!)
  • Going with four pieces instead of three didn't necessarily increase the strength of the anchor (why waste pieces?)
  • Even if your anchor spans a total angle of 90 or even 120 degrees, finding the best pro placements is more important to the structural integrity of the anchor
  • Avoid short, stiff legs; better to extend the other pieces so the cordelette has more uniform legs
The article also references some previous research that showed...
  • the shelf is an appropriate clip in point
  • an overhand is sufficient


Link to source file (Multi_pointpre_equalizedanchors.pdf): http://www.sendmefile.com/00547721

Not climbing physics, but what do climbers think? (Beverly, 2005)

Beverly conducted an online survey of climbers in 2005, and found some really interesting responses to 28 questions from 407 climbers. (Climbing Nerd Level 0)

Did you know that...
  • 73% expect their belay device to hold fall factor 2 events (see separate blog entry)
  • 71% have had some formal climbing training
  • Only 25% believed that ice screws should be placed angled 10 to 20 degrees down from perpendicular to the ice (31% said up and 16% said straight) (see separte blog entry)
  • 50% of climbers have taken <10>
  • Only 9% of climbers have taken falls with a fall factor >1.5, but 20% have witnessed other climbers taking FF1.5-2 (so who are they?)
  • Only 24% of respondents had a piece of pro fail during a fall, so 76% have not had pro fail
  • 51% had been hit by rockfall while climbing
  • 18% report climbing weights >190 lbs, which means those standard tests for gear strength don't necessarily apply
  • 41% had witnessed a climbing accident where bones were broken from a fall
  • 17% had needed assistance or rescue from a climbing accident

Here's something interesting. In response to the question, what's the greatest distance you have fallen on a rope outside...

  • 32% had fallen <10>
  • 31% had fallen 10 to 20 ft
  • 17% had fallen 20 to 30 ft
  • only 20% had fallen over 30 ft

Median number of days climbing per year...

  • 24 in a gym
  • 12 sport climbing
  • 10 multi-pitch trad climbing

So who are these climbers?

  • 34% belong to a local climbing club
  • 29% belong to a mountain search and rescue organization
  • 19% belong to the Access Fund
  • 29% don't belong to any of these

Link to the report summary (WhatClimbersThink.pdf): http://www.sendmefile.com/00547713

Defining Climbing Nerd Levels

How to put an objective measure on a subjective rating? I am a nerd and I climb; therefore, I am a climbing nerd. But there are oh so many shades of climbing nerdiness, and the subject I include in this blog will appeal to climbing nerds of all levels. Here's my shot at a rating system:

  • Climbing Nerd Level 0- Math class is soooo hard! How do you spell fiziks anyway?
  • Climbing Nerd Level 1- I climb, and I want to live. It would probably make sense to learn a little more about the systems that I use to attach myself to the world.
  • Climbing Nerd Level 2- Wow, I guess physics really does have a practical application, and I secretly enjoy the greek letters and equations, even when I don't entirely understand what they mean.
  • Climbing Nerd Level 3- Physics rocks! I'm going to buy my own dynamometer to double-check these findings.

Enjoy!

Ice Screw Testing in Ouray, CO (Beverly and Attaway, 2005b)

It's the ice, stupid!

We've been taught this about falls while ice climbing: DON'T. Not bad advice, but what's it based on? Yes, there are all of those sharp objects involved with our choice of climbing medium, any one of which could do severe damage. But just how much can that screw hold? Beverly and Attaway put real screws to the test in vertical waterfall ice. (Climbing Nerd Level 2)

They tested three hypotheses:
  1. The force determines whether the ice screw fails or not

  2. Short screws in good ice don't resist high forces

  3. Falls on ice protection generate the same forces as falls on rock protection, and placed correctly in good ice may surpass rock gear

Previous drop testing on screws in aerated ice by Luebben found lots of failure, but the study did lead to a change in the orientation of ice screws: counterintuitively, 10 to 20 degrees downward instead of the previous practice of 10 to 20 degrees upward. (Why? Because a hollow tube resists a force better because of skin friction (and threads) than taking a force from the side.)

Details: GriGri with a stopper knot to reduce rope slippage, Rescue Randy (172 lbs.), ice type typical of most water ice characteristics, fall factors 1/2/1.7, both lead climbing and anchored set ups. Screws tested: Grivel 360, Petzl Laser, Petzl Laser Sonic; all (13-cm?) stubbies.


Meaty tidbits of knowledge:

  • Ice screws failed when the force was between 4 and 14.5 kN (message: ice screws can fail under pretty low load when placed in suspect ice as was the 4-kN test event)

  • Ice screws held forces between 5 and 15 kN (message: ice screws can hold even under pretty high load)

  • 11 out of 61 tests showed screw failure, which means 50 out of 60 held the fall

Huh? The screws that failed tended to face a higher load than those that were successful, but clearly there are other factors at play besides how much force is placed on the screw. Turns out it's selecting good ice for placing a screw. Anecdotally, they mention that they found more failures in the morning than in the afternoon, possibly because of morning/afternoon temperature changes. Brittle conditions appear more prone to failure.


Recommendations:

  • The fall factor 2 drops generated a maximum force of 8.6 kN with no failures, but this is not a good reason to place your first screw way above your last anchor

  • Place screws in a zone of compression (read this as a concave depression, as opposed to a convex zone of tension)

  • Small air bubbles doesn't necessarily mean it's poor quality ice

  • Ice hooks did not hold any falls


Source file (sorry for the ads) DynamicShockLoadEvaluationofIceScrews_Final.pdf: http://www.sendmefile.com/00547701

Belay Device Tests (Beverly and Attaway, 2005)

(or, Why Friction is Our Friend)

How do belay devices work? What forces are generated by falls? What are UIAA requirements for belay devices?

These are some of the questions the paper (link below) addresses, and it raises the issue that some manufacturers do not recommend using their gear in falls with a fall factor greater than 1. And, there is no strength standard for belay devices, mostly because CE standards are for passive activites, rather than actions like a human stopping a fall with a belay device. The paper argues for a strength standard for belay devices and covers the minutiae of testing variables, like age of the rope, the use of an 80-kg weight to represent a more pliable and stringy human, auto-locks vs. hand braking, etc. This part will appeal to Climbing Nerd Level 3 (whatever that is-- maybe I should define it?).

But, what might be of interest to recreational climbers is the static pull testing Beverly and Attaway performed on many belay devices on the market today. Check out Figure 11 on page 17-- a reminder that ascenders are designed for ascending. Think before using these devices on fixed lines-- could you generate a 5-kN force? Quite possibly. And, Figure 13 confirms that dynamic events are a whole other story. Avoid fall factor 2 dynamic events (duh!). Climbing Nerd Level 2.

Link to belaydevice_Hang_Em_High_Final.pdf:

http://www.sendmefile.com/00547691

Strength of Snow Anchors and Pickets (from New Zealand)

New Zealand snow science people did a bunch of research and compiled information on the strength of snow anchors. Good reading for nerds, but there are some great concepts and issues that are raised that should be of interest to anyone who has ever used a picket. Here's a link to the source file (snowanchors_newzealand.pdf):

http://www.sendmefile.com/00547648

(Sorry about the ads on the free file hosting site-- it is safe to download from this site. Just close your eyes for five seconds. Hopefully blogger adds PDF capability soon.)

Much of the discussion is based on potential rescue loads of 20 kN, but the concepts are also applicable to climbers using snow anchors for pro, belay anchors, and rappels. Overall I would rate it a Climbing Nerd Level 2.


Consider these points:

  • Strength of the snow (powder snow vs. consolidated and moist snow-- can you make a snowball?)
  • Connection point to the anchor (top hole, middle hole)
  • Upright or horizontal (deadman) placement (angle of placement important for uprights)
  • Carabiner clip vs. girth-hitched sling
  • Picket material (aluminum vs. steel)


Meaty tidbits of knowledge:

  • Deeper horizontal (deadman) placements have a higher strength than shallower, because they create a larger "failure cone"
  • For multiple placements, like in an equalized anchor, separate by a distance at least twice the depth of the deepest anchor
  • If belaying from a snow anchor, keep at least 1.5 meters (4 to 5 feet) between the anchor and the belayer to avoid pulling up on the anchor
  • In strong snow, tilt the picket back no more than 10 degrees from perpendicular to the snow surface to maximize the cone
  • Beware of placements where the direction of pull is upward (running belays over a lip, belay anchors)


Recommendations:

  • For snow that can be compacted (you can make a snowball), use an upright placement with a midclip or a horizontal placement (deadman) with a midclip
  • For snow that is too hard to dig a trench, use an upright placement with top clip tilted back 10 degrees
  • For very cold or very wet snow that cannot be compacted into strong snow (less typical in the Cascades), use a picket placed as a fluke or a horizontal placement (deadman)


Cool stuff, no?

Climbing physics and other nerd stuff

I've begun to collect a bunch of information on the physics of climbing, not just because I'm a nerd, but because it's not really compiled in any one location. As I find other sources of information, I'll add in here.

Tuesday, June 19, 2007

Ouray Ice Climbing 2007

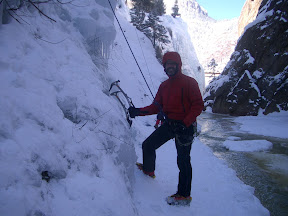
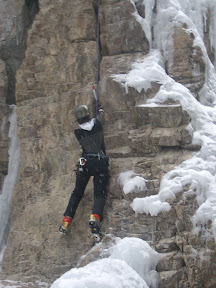
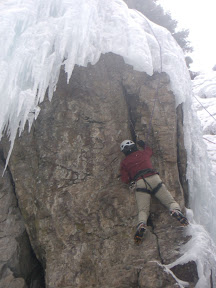
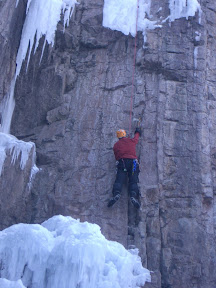
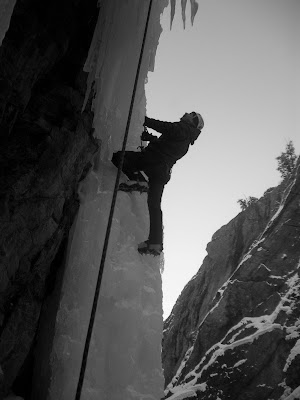
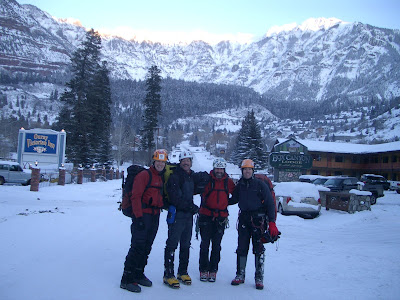
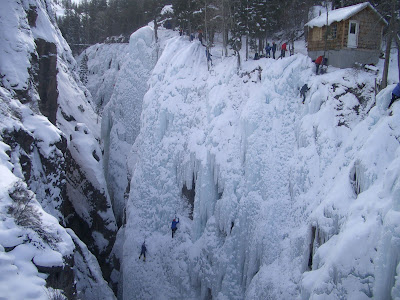
A group of 12 climbers from the Tacoma Mountaineers headed to Ouray in January 2007 to get in some ice climbing and watch the annual Ouray Ice Festival. The Uncompaghre Gorge is a pretty spectacular place to be when the ice is in. And it’s pretty much always in during the winter months, thanks to a permanent irrigation system that makes ice whenever the sprinklers are turned on. Here’s Rex about half way up the classic WI4 line, Pick of the Vic:

It’s a great place to tune up your ice skills and work on mixed climbing. There are over a hundred single-pitch routes of difficulty ranging from WI2 to WI6, and more and more mixed routes from M4 to the comp routes. We never run out of routes, even climbing there for a week.

This was Julie’s first visit, and after getting over the shock of “I’m going to climb THAT?!” she took to the ice like white on rice. Or ice. She liked her new Vipers and discovered the joys of leashless climbing when the rope wrapped around her tool.


Tom had been there several times. As a flashback to the infamous cave crawl from a few years ago, he demonstrated one of his patented knee scrums coming out of an ice chimney:

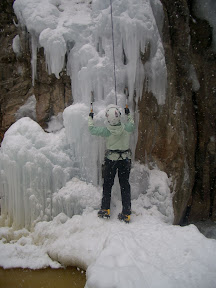
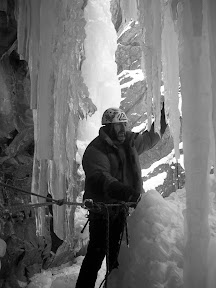
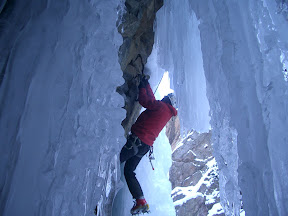
The week was crazy cold. There was a blizzard in Pugetopolis while we were gone, and it was even colder in Colorado (subzero without the windchill). The ice turned very brittle, and we started looking for anything in the sun. Here’s Marty in full regalia down in the School Room:


When the festival rolled around, several of us signed up for clinics from the professionals. What an amazing sport when you can get face time with the world’s best athletes and they’re actually interested in teaching newbies the ropes. Maybe the sponsors give them incentives, but I’ve never come across a punk in the lot. I hope they keep doing it—it gets people psyched about ice and mixed climbing.

Eva, Mugs, and I signed up for a women’s mixed climbing clinic, taught by Carolyn Parker and Zoe Hart. It was a bit melancholy, because just the year before, several of us had taken a women’s ice clinic from Sue Nott and Karen McNeill, who died in Alaska a few months later. Carolyn and Zoe kept up Karen’s tradition of sparkles and never apologizing for slips.

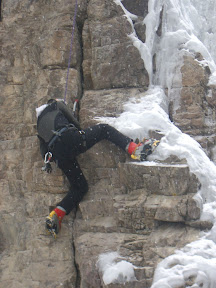
We had a blast on Jesus Built My Finger Crack (M7) in the Mixed Alcove. The climbs always look intimidating from the base! The ice part is no sweat, but then the fun begins. Getting that first good torque in the crack is reassuring, then the focus turns to your feet. The trick is to move reasonably quickly and avoid over-pumping, not so easy to do with my ancient clodhopper boots. I was glad to have my monopoint crampons but missed the lightweight comp boots I had demo’ed the day before.


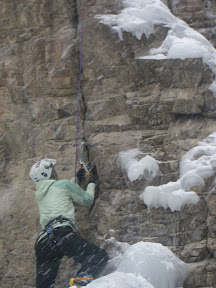
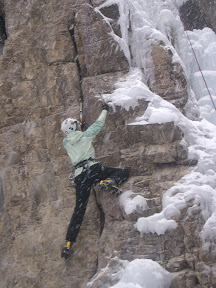
Mugs cranked it. She pulled a fun, opposing pressure move with her tool torqued in the crack, practicing her lieback for Super Dave, no doubt. No, she’s not wearing heel spurs.


This was Eva’s first trip here, too, and maybe her third time mixed climbing. Not bad!


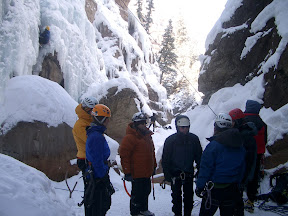
I signed up for a hard mixed clinic with Guy Lacelle. Ever since I saw him do the splits into a heel hook over his head in the 2006 Competition, I had wanted to take a clinic from him. And what a bonus, Audrey Gariepy (second overall in 2007 and first in the women’s) came along for the clinic. To their credit, they were both great instructors and just nice people. Here they are (Audrey second from left and Guy third from right) with the other clinic participants. We had fun on TicTac and SuperDave.


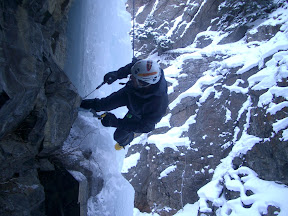
TicTac is usually pretty packed, but we found an opening a few days after the competition. Lots of our peeps had fun on that one. The ice curtain that makes a good Figure 4 primer was hacked out. Here’s Jim:


We got some leads in, but the brittle ice wasn’t happy ice for pro. Bob and I swung leads on what looked like a fun climb from the bottom, but turned into a nasty hard shell crust about 4 inches thick that slid off of the snow layer below it. That one took longer than anticipated.


The brittle ice drove us into the mixed route in the School Room by the pillar, which was being climbed by some people who did not understand that you do not whack the heck out of a free-standing pillar, particularly on cold brittle days, and particularly when it makes that really nauseous THUNK noise. I’m sure they got some RAD photos to show the guys back home! If they lived that long….

Now, my buddy Mark and I are a wee bit competitive. Well, I’m not, but he is. He didn’t want me having all the fun on the mixed stuff. He and Marty set up a nice redirected belay in a cave protected from the next-door-whackers and other shrapnel, which made for a cozy environment for lots of smack talk. A cozy –10F or so.


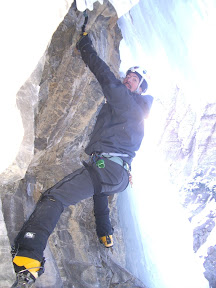
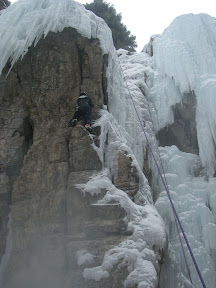
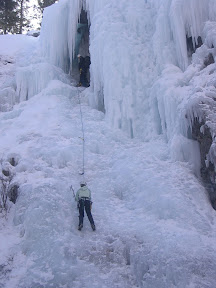
He did make it out of the cave and onto the ice curtain, but not before doing his best impression of a piƱata:


OK, here’s his glory shot:


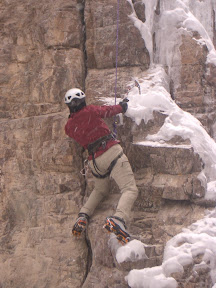
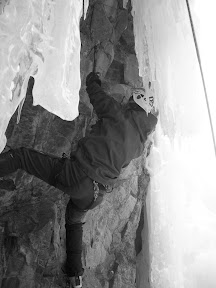
Marty was up next, not to be outdone:


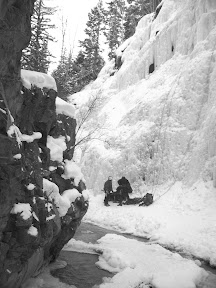
Just as we were calling an end to our day, it got a bit more complicated. There were some other folks in the School Room that day besides our party. We heard a yell and a splash, and we looked over to see a belayer in the creek—not a good thing on a cold day. Jayson was right next to him when a one-foot long chunk of ice dislodged from the climber and hit the belayer square on the helmet. Jayson, Marty, and Mark quickly dragged the belayer out of the water, Mark stepped on the rope, then I grabbed the rope headed up to the now-soloing climber.

It was a minute of chaos before people drifted into roles, but the bonus of climbing with people you know well is that you trust each other. While Jayson, Marty, and Mark stabilized the belayer on a foam pad, I lowered the climber to the base. Everyone stayed remarkably calm, thankful that the belayer was talking and together. The climber didn’t panic either. Fortunately, another party had a doctor as a member, so she came over and took over primary patient care.

Since we were just about to leave, Jim had walked around to the top rope anchors to start tearing stuff down. He didn’t know what had happened, but after a few yells back and forth, a passerby had called Ouray Mountain Rescue (I guess he had Mark Miller on speed dial) and Jim stood by making sure no one set up over the top of the group.

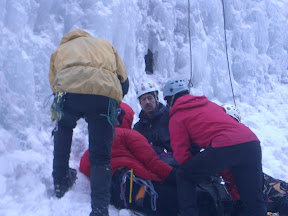
Between the belayer and climber, we had some warm clothes, and the water hadn’t saturated the belayer. Still, the belayer began to shiver, but given his head, neck, and possible back injury, we didn’t want to jostle him to get him in dry clothes but instead relied on about a dozen chemical heat packs around his neck, face, and chest. He was amazingly coherent.

Ouray Mountain Rescue was on the scene with a litter in maybe 10 to 15 minutes. They got the belayer into an inflatable body splint and about eight people carried the belayer to a hoisting system set up on the new School Room access ladder. Meanwhile, I walked around with the climber to gather gear and carry out to the road. He was really shaken up, but held it together amazingly well.

Fortunately, the belayer was fine—nothing broken. He just had a sore neck for a few days. The climber was OK as well, but no doubt had some post-traumatic stress. What was interesting is that some of our group also had some post-traumatic stress symptoms. The situation would have been far more dire had the Ouray Mountain Rescue group not arrived lickety split. I think the belayer must have some pretty cosmic karma to have survived what we think was about a 150-pound block of ice landing on his head. Note to the world: wear helmets! They’re cool!


We took a parting shot of the response team before heading back to the condo, where we debriefed after the incident. We had all noticed little snippets of things that concerned us as we observed the climber and belayer, and when we put it all together, we think several things contributed to the accident.

First, it was a really, really cold day, and the ice was incredibly brittle. Yet several of us saw the climber really whacking away at the ice. There wasn’t any need to, since after the crowds of the ice festival, all the routes in the School Room were really picked out and made for perfect hooking with few if any swings required. That was a matter of adjusting your technique to the conditions present, something the climber didn’t do.

Second, we had lengthened the anchors just enough to be able to belay that route from an island in the river. One of our party members said something to the belayer about not belaying directly under the climber, but the belayer responded that he thought they were fine.

Third, there had been climber-inflicted icefall all through the clinics in the School Room, but they came after the festival. Another party member had told them to watch out for an open area where the ice that hit the belayer came from.

Each warning flag was a solid yellow light, and together they represented a big blinking red light, but no one person saw each warning flag until we compared stories afterward. The whole situation represented a huge learning opportunity, and it would be folly to chalk it up simply to lack of skills on their part.


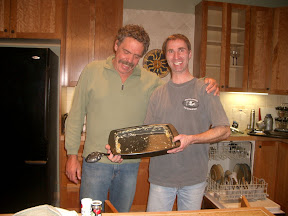
The condos were pretty plush, first above Bill’s climbing shop with Cindy and then at the Alpenglow units. We fed well, and usually cleaned the pans. The couches were cozy, too. Maybe a little too cozy?


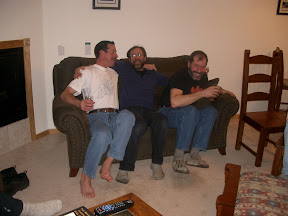
Ouray ice climbing is just fun, the festival and professional climbers are an added bonus, but it’s my climbing partners that make me as happy as Chuck’s helmet in a snowstorm:

Friday, June 15, 2007

Mt. St. Helens climb on Mother's Day 2007

Climbing Mt. St. Helens is always fun, and it's even better with a few hundred people dressed in drag. Yes, it's "climb Mt. St. Helens on Mother's Day dressed as your mother." I usually avoid crowds in the mountains, but this is the exception.

On May 12, 2007, our intrepid group (Mindy, Jim, Jeanne, Dee, and Erica) set out from the SnoPark (Climbers' bivy was still closed) under overcast skies after spending the night in the lowland campground by the reservoir. Even at 6:30 a.m. the parking lot was brimming. No snow on the trail to around 3500 ft, then patches, then full coverage. We had a normal snow year, too. I guess the spring rains took care of that.


We have been doing this since 2002 or so, but when MSH was closed down for climbing, we decided to climb another mountain on Mother's Day, but dressed as superheroes. Why? I really don't recall. But we combined the themes for MSH2007: we dressed as superhero moms.

Note: our dresses are not a reflection of our mothers (they made us say that before we posted).

It's a pretty jovial crowd, and there is much mutual preening and admiration. When we stopped for a rest just before the final section to the summit, one woman wanted to know if I (dressed in leopard print hat and dress) was pimping out Pink Panthera. Nope. You can look but you can't touch. Is it the short pink skirt or the bunny purse that draws them in? I know, it's the bunny purse.

The overcast skies cleared with about an hour to go, which really brings out the colors in the dresses. The temperatures had been pretty warm, and we saw the signs of a textbook spring wet avalanche. I'm sorry, I just can't turn off my inner nerd.


We had great views of Rainier, Adams, and Hood. If you haven't seen the building lava dome, get up there and look! But not too close to the corniced edge. Snow conditions were pretty good-- no postholing but no crampons necessary. We made it up in maybe 4 hours from the parking lot. Steps were very well established by the horde.

And what a colorful horde it was! There had to be 300 people, and half in drag. The other half were slightly puzzled. Only one or two were unhappy at having to share the mountain with the mob-- enjoy the quota system next time. There were skiers and boarders and climbers and hikers. They were dressed in floral prints, some sequins, a few externally visible WonderBras, and some very tasteful straw hats with flowers. There was only one bunny purse, though. It was so popular that Pink Panthera is converting it to a chalk bag for summer rock use. Watch for him on the crags.


We ate, took pictures, and posed for pictures for an hour basking in the sun and surprisingly wind-free conditions. SuperMa (Dee) had to take off her red cape since it was bunching under her pack. Leopard Lady (Erica) and Lianessa Jr. (Mindy) would have been hard to spot in the forest, but clearly stood out against the snow (next year we'll be snow leopards). AquaMom (Jeanne), complete with fish-covered shower cap, was quite popular with the crowd. But the standout favorite was Pink Panthera (Jim). I wonder how many other blogs he is featured on? We took a picture for next year's Christmas letter (and to embarrass our mothers).


Some folks were passing around a great "Hi Mom!" sign for everyone to take pictures with. We decided to go with edible art for our message to Mom:

Then we bid farewell to summit of Mt. St. Helens, took a last sweep of the volcanoes on the horizon, and zipped down the mountain on one of the best glissades ever-- over 3000 ft vertical!


New blog with recent adventures

Finally getting my act together and creating a share site for recent adventures in the mountains and on the waters of the Pacific Northwest and beyond. Look for photos and trip descriptions soon.